centos+minio+nginx 搭建自己的图床
由于自己不会配置如何按照每一篇博客在hexo中打包博客中的图片,所以想要自己搭建一个图床,总体效果很满意。
将配置过程记录,方便之后重新配置。
这是搭建好的效果图
我们可以随时访问自己博客中的图片。
安装 Nginx
使用下面命令安装 nginx
yum install nginx -y
显示以下信息表示安装完成
Loaded plugins: fastestmirror, langpacks
Determining fastest mirrors
Resolving Dependencies
.........
Installed:
  nginx.x86_64 1:1.20.1-9.el7

Dependency Installed:
  gperftools-libs.x86_64 0:2.6.1-1.el7                               nginx-filesystem.noarch 1:1.20.1-9.el7                               openssl11-libs.x86_64 1:1.1.1k-2.el7

Complete!
启动 nginx
nginx
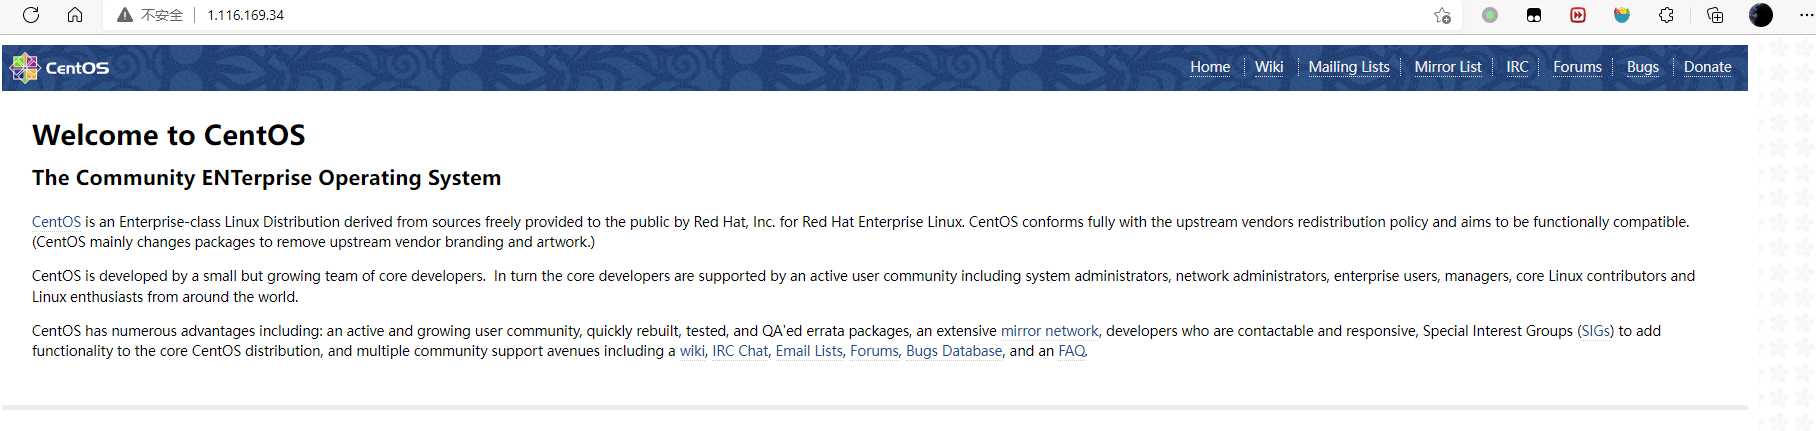
在地址栏中输入服务器 ip 可以看到下面信息表示安装成功。
安装 Docker
安装一些必要的系统工具:
sudo yum install -y yum-utils device-mapper-persistent-data lvm2
显示以下信息
Loaded plugins: fastestmirror, langpacks
Loading mirror speeds from cached hostfile
Package yum-utils-1.1.31-54.el7_8.noarch already installed and latest version
Package device-mapper-persistent-data-0.8.5-3.el7_9.2.x86_64 already installed and latest version
Package 7:lvm2-2.02.187-6.el7_9.5.x86_64 already installed and latest version
Nothing to do
添加软件源信息:
sudo yum-config-manager --add-repo http://mirrors.aliyun.com/docker-ce/linux/centos/docker-ce.repo
显示以下信息
[root@VM-0-15-centos ~]# yum-config-manager --add-repo http://mirrors.aliyun.com/docker-ce/linux/centos/docker-ce.repo
Loaded plugins: fastestmirror, langpacks
adding repo from: http://mirrors.aliyun.com/docker-ce/linux/centos/docker-ce.repo
grabbing file http://mirrors.aliyun.com/docker-ce/linux/centos/docker-ce.repo to /etc/yum.repos.d/docker-ce.repo
repo saved to /etc/yum.repos.d/docker-ce.repo
更新 yum 缓存
sudo yum makecache fast
安装 docker-ce
sudo yum -y install docker-ce
显示以下信息
Loaded plugins: fastestmirror, langpacks
Loading mirror speeds from cached hostfile
Resolving Dependencies
--> Running transaction check
---> Package docker-ce.x86_64 3:20.10.12-3.el7 will be installed
--> Processing Dependency: container-selinux >= 2:2.74 for package: 3:docker-ce-20.10.12-3.el7.x86_64
--> Processing Dependency: containerd.io >= 1.4.1 for package: 3:docker-ce-20.10.12-3.el7.x86_64
--> Processing Dependency: docker-ce-cli for package: 3:docker-ce-20.10.12-3.el7.x86_64
--> Processing Dependency: docker-ce-rootless-extras for package: 3:docker-ce-20.10.12-3.el7.x86_64
--> Processing Dependency: libcgroup for package: 3:docker-ce-20.10.12-3.el7.x86_64
........
Complete!
启动 docke 后台服务
sudo systemctl start docker
查看 docker 版本
[root@VM-0-15-centos ~]# docker -v
Docker version 20.10.12, build e91ed57
docker 配置 MinIo
拉取 MinIo
我们这里选择拉取旧的版本,新版本在访问文件时有访问已被取消的问题
目前这个问题没有解决,所以我选择一个旧版本安装。
[root@VM-0-15-centos ~]# docker pull minio/minio:RELEASE.2021-06-17T00-10-46Z
创建存放 minio 的文件夹
mkdir -p /mnt/minio/{data,cofig}
关闭防火墙
docker 中容器需要用到很多端口,在没有配置 nginx 之前,可以先将防火墙关闭
systemctl stop firewalld.service
启动 MinIO
-d 表示在后台挂起
-p 指定端口 MinIO 的默认端口为 9000
MINIO_ACCESS_KEY=admin 设置用户名为admin
MINIO_SECRET_KEY=12345678 设置密码为12345678
[root@VM-0-15-centos conf.d]# docker run -d -p 9000:9000 --name minio  -e "MINIO_ACCESS_KEY=admin"
-e "MINIO_SECRET_KEY=12345678"   -v /mnt/minio/data:/data   -v /mnt/minio/config:/root/.minio   minio/minio:RELEASE.2021-06-17T00-10-46Z server /data
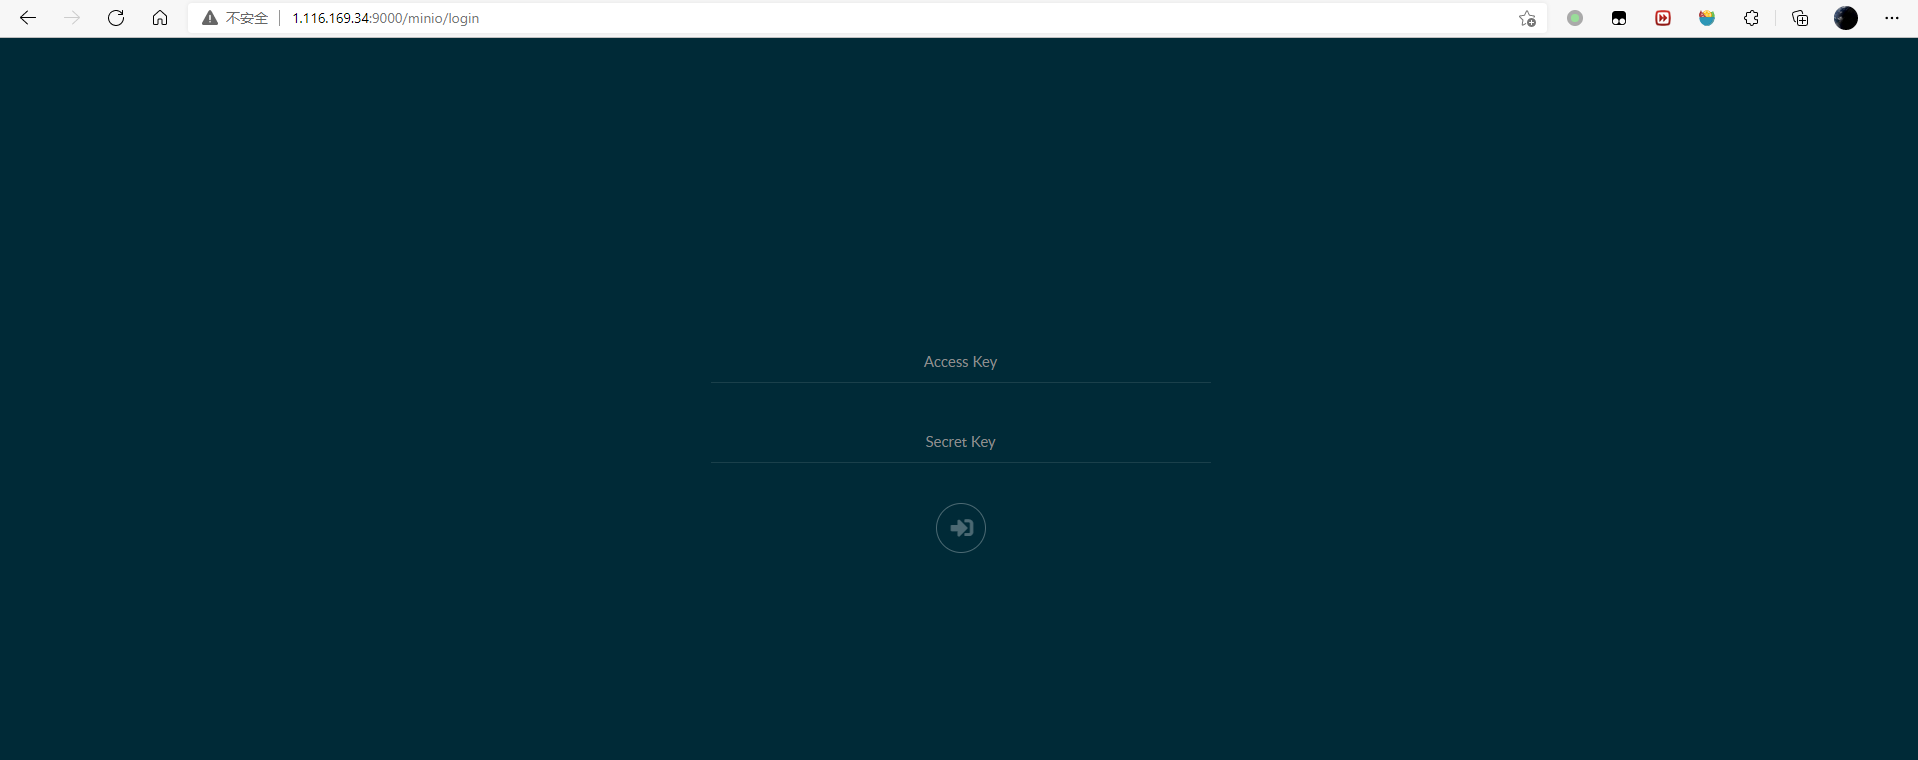
进入控制台
在浏览器中输入 ip:9000 即可进入 MinIO 的控制台
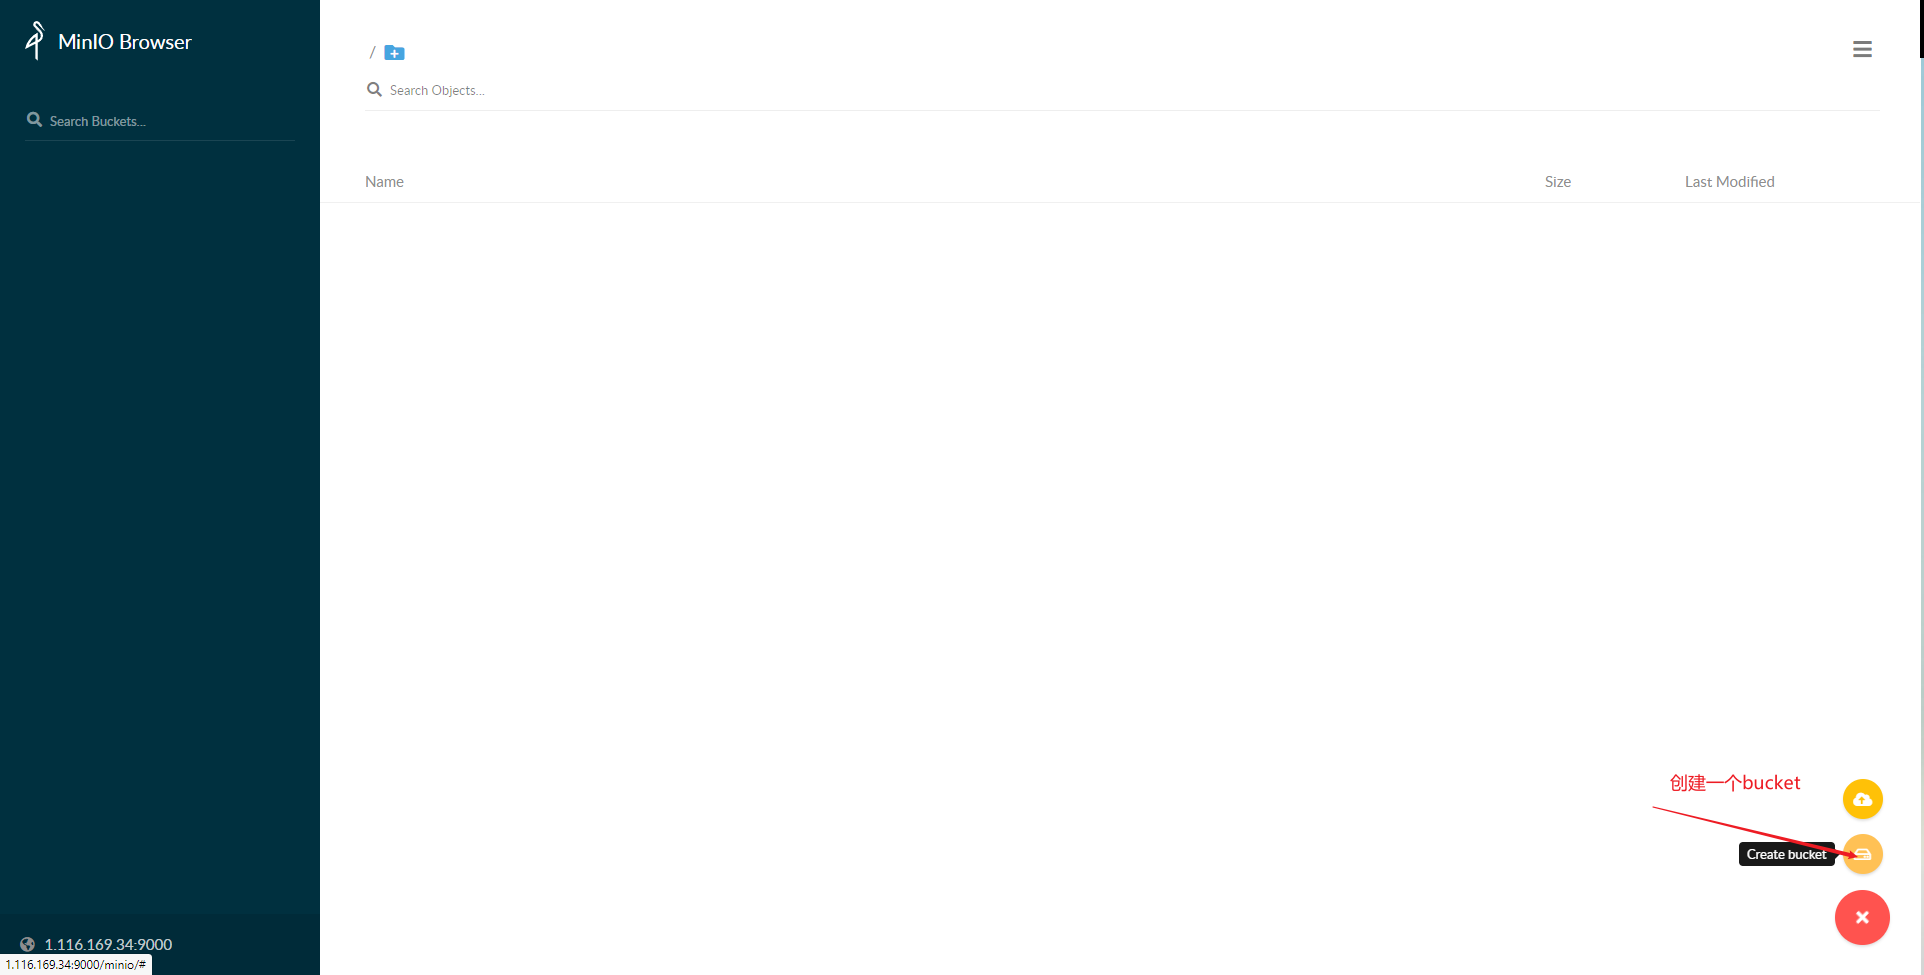
新建一个 bucket 叫 test
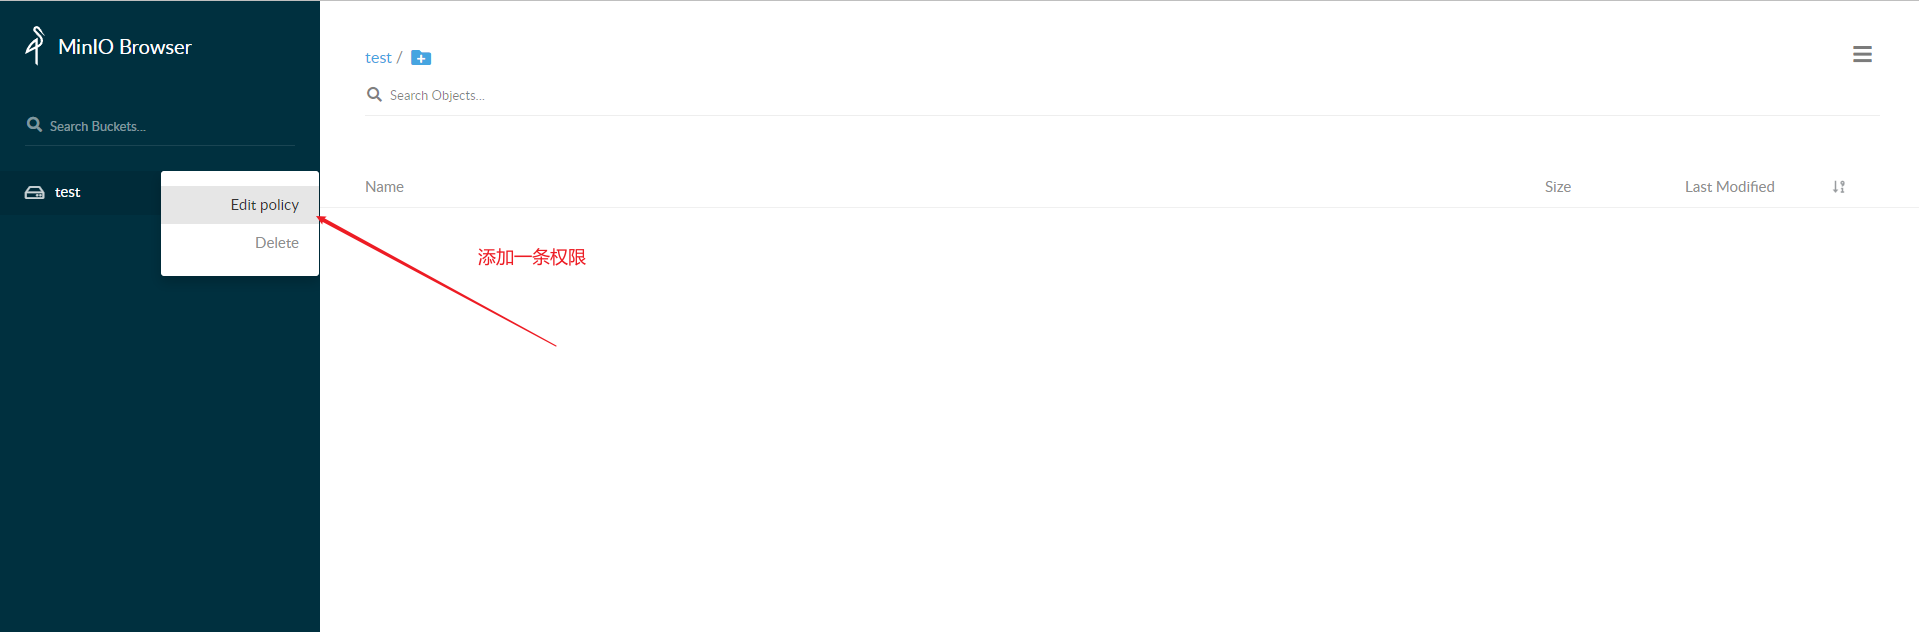
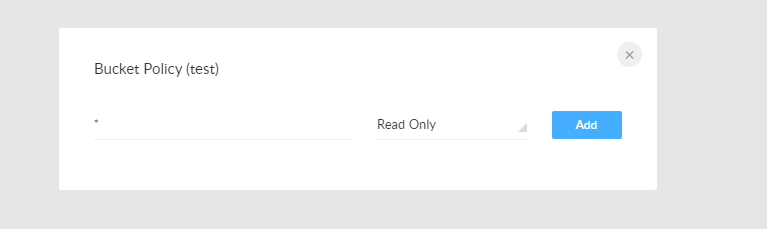
添加权限
给这个桶添加public权限
上传文件
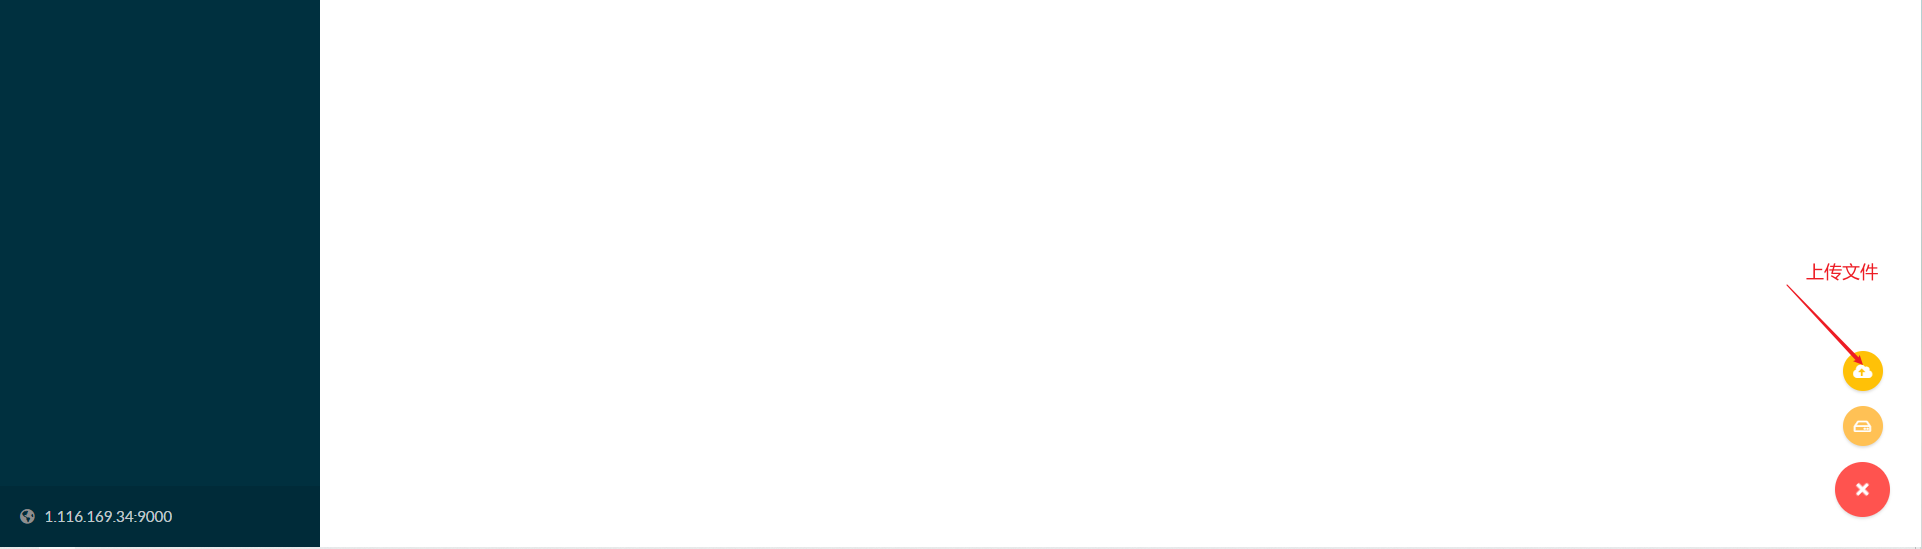
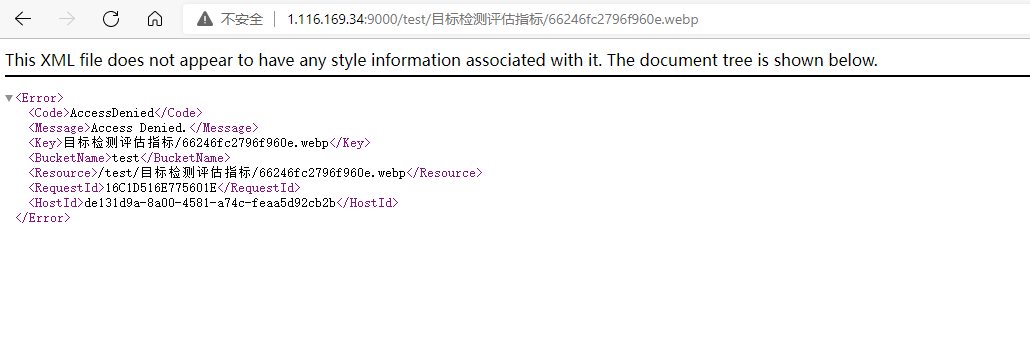
访问上传的图片
在浏览器中输入 ip:9000/刚刚创建的 bucket 名称/上传的图片名称
http://1.116.169.34:9000/test/image-20211014225210485.png
配置 nginx 代理
在etc/nginx/cof.d中新建一个配置文件minio.conf写入
server {
 listen 80;

 location / {
        proxy_pass http://172.17.0.15:9000;  //172.17.0.15为内网的本机ip
 }
}
查看配置文件是的正确
[root@VM-0-15-centos conf.d]# nginx -t
nginx: the configuration file /etc/nginx/nginx.conf syntax is ok
nginx: configuration file /etc/nginx/nginx.conf test is successful
重新加载 nginx 配置文件
nginx -s reload
再次访问文件